Updating RV Cooking Appliances

After a couple of years of real life experience on the road, I’m deciding to update the appliances in my 1975 Argosy/Airstream 24. Which is to say, I’m going to get rid of the original MagicChef range and oven.

I have a really great (relatively compact but powerful) microwave and a really great toaster oven (big enough for a 12″ pizza) in the pantry, but those can only be used on shore power or generator.  I’ve always thought it was a good idea to be able to *fully* prepare meals while running only on propane, but after a lot of time in the vehicle, I’m rethinking that notion.  Plus, I’m about to buy a dual-fuel generator, so technically I will be able to use those electric appliances via propane.

A quick aside before I go on… in the past, a “combo” microwave/oven has not been a realistic option.  The technology has just not been there.  No combo microwave unit could cook a crispy crust pizza, so that was that.  I think the technology is improving, but I am still utilizing two separate units.  I make toast/bagels often enough that I feel justified in having a separate microwave and toaster oven, and the toaster oven definitely makes a good pizza (or poppers, or frozen egg rolls, etc.).  Also, there are some really great multi-function toaster ovens now that include an “air fryer” option, so I think a microwave with a separate toaster/oven/air fryer is currently the best set up.

On to the cook top…

In the past, I usually scoffed when I saw galley set ups that included only a two burner cooktop.  In reality, I have NEVER used more than two burners at once.  I do almost always use two burners, but never more (quoth the raven).

The actual oven has never been used for anything but “storage” (and bad storage at that).  Not in my Argosy; not in my Landyacht; not ever.  Since the toaster oven is a good one, I have always done any “baking” (usually a pizza or lasagna) in the toaster oven.  I know if I was without shore power I couldn’t do this, but at that point planning a different meal is fine.  Plus, I recently installed an exterior grill (Olympian 5500 professional series) that could easily function as an oven if I absolutely had to have a propane powered oven to cook something.

So now the question is: what cooktop to install?  The main issue I have with the current cooktop (other than taking up too much counter space), is that the burners don’t have a high enough output.  I think they were probably originally rated around 6500 BTU, but after 40 years, even that is likely an optimistic figure.  It takes a million years to heat up water for coffee, and I can’t even think about boiling a large pot of water for pasta.  This probably makes this particular cook top safer (it’s not creating as much combustion exhaust inside the camper), but I am aware of the issue and pay attention to that factor when cooking, so I’m comfortable moving to something with a higher BTU output.

Another factor that needs to be considered is the “travel-ability” of the cook top unit.  What this means is being able to cover it up (ideally creating a flush countertop) and not having the burner covers, cooking grates, etc., rattle around while bouncing down the road.

There are a slew of $100-200 two burner units on Amazon, etc., but even if they are labeled “drop in,” almost all of them sit above the counter.  They also have grates and burner covers that simply rest on the surface, so they will definitely bounce around and cause a lot of noise (and possibly damage) with road vibration.

It’s also surprising to me how many cook top burners, even ones designed specifically for RV’s, have only 120v igniter options (they plug into a regular household outlet just to start the flame).  Why in the world isn’t 12v or even a AA battery the standard here?!  That problem can be easily remedied with modification (installing your own igniter), but it seems crazy that I will have to make this mod in the first place.

Dometic seems to be the only readily available unit that is properly “recessed,” but the burners are only rated 7,200 and 5,400 BTU.  This unit does however have a 12v igniter, so at least there’s that.  I don’t think I would be happy cooking on the “wire” grate pictured on the unit above, but for an extra $50 they do offer a more sturdy cooking grate option.  Here’s the kicker though… all of the reviews I’m reading about this unit (mostly 1 star) are people ranting about the fact that the description does not disclose that you can’t use it over 4,500 ft.!  I LIVE at 6,000 ft., so this thing won’t even work in my driveway!  Obviously the Dometic is not for me.

All of the other recessed propane burners I’m finding are really chintzy looking “camping” units (I’m looking at you Atwood and Suburban), so I have a feeling I’m going to end up finding a commercial two burner unit and modifying it for my own needs.  I plan on installing a butcher block countertop, so I could modify the opening to allow the cook top to sit lower, and then I can make a flush-fit cover.  So… as usual, I guess custom is the only answer.  Perhaps I will dismantle a stainless steel grill and go from there.

I do have to admit, this little Wedgewood is gorgeous…

External Propane Tanks and Accessories

Disclaimer: Propane is flammable.  The information provided here is *general information* culled from the web.  I cannot be held responsible if you blow yourself up or burn off your face or someone else’s.

The “Stay-a-while” type adapters simply add two ports to your existing propane supply line, and cost around $30 at the time of this posting.  The Stanbroil version pictured above actually calls it what it is: a brass tee with 4 ports. Theses adapters go just after the propane tank but BEFORE the regulator, and are thus for HIGH PRESSURE.  Usually one port is a disposable one pound container fitting (1″-20), and the other is a threaded quarter inch inverted flare fitting (both attached to the tee via 1/4 male pipe threads). I swapped the 1/4″ inverted flare on mine for the QCC fitting typically used to connect back to the supply line, so the QCC port is now available for an external tank connection.  I left the “disposable 1lb. tank” connector for hooking up external high pressure appliances like camping stoves that normally use the small disposable tanks.  I then made my own supply hose to go from QCC to QCC (i.e. To connect a typical tank with the “big threads” to the “big threads” now on my RV supply line.


Some useful information…
POL is short for Prest-o-lite, the company that first started manufacturing this connection.  POL is the connection that utilizes the INSIDE thread.  A POL connection usually requires a wrench to get the connection tight enough to prevent leaking.

QCC stands for Quick Closing Coupling.  A QCC connector uses the giant external threads you typically see on a 20# propane BBQ tank.  The big plastic nut part of the QCC connector is often called an Acme Nut and is what threads onto the big QCC threads.

The pressure coming out of a propane tank when the ambient temperature is 100 degrees Fahrenheit is around 172 PSI.

Low pressure propane quick-connects are to be used AFTER a regulator.

A propane supply line quick connect must be High Pressure, not the low pressure rated ones typically marketed for RV’s and available from brands like Camco and Mr. Heater.  These low pressure accessory quick connects are labeled as being made for 1/2 psi (low pressure) lines.


Things I Learned on Roadtrip #5

So… we’re getting there.  This is the first trip where things started being… genuinely comfortable.  We traveled over two thousand miles in nine days from Denver to Alamosa (via the mountainous highway 285) to ABQ to the Grand Canyon to Las Vegas and back.

All appliances function as they should.  We’ve got running water and drains, a working toilet (which is completely custom and water-less, though not quite perfected yet), a working dishwasher, kitchen cabinets for pantry storage, a powerful whole-house vacuum (a must-have with dogs), a dining table with seating, television with game console (N64!), propane heat, air conditioner, a Fantastic Van, and comfy beds.  The only major thing that’s missing is a water heater (and eventually the radiant heat system), but we didn’t really miss it on this trip, even though there were times when outside temps were below freezing (in a pinch, if you really need warm water to wash up with, you can always heat up a pot on the stove).

I still need a more permanent window covering solution (we’re currently using panels that fit inside each window cavity), but I’m getting close on that.

The Fewer Things You Have to Move for Access the Better

I made the dinette seating so you can keep bins below for “utility stuff” and other sundries (extension cords, bungees, lantern, tape, velcro, etc.), as well as access to the 12v system (batteries, converter/conditioner, and 12v fuse panel).  While it’s really nice having all that storage space, it really is a pain to have to move people, cushions, and anything else sitting on the bench before lifting the bench panels to get at the things you need.  And I found out quickly that I need to get at those things a LOT more often than I anticipated (don’t even think about keeping dog food under your seating!).

Future builds will definitely include a larger exterior-access utility bay for tools and other “heavy utility” things, and I am still working on ways to make the under-seating storage better without resorting to front-access panels/doors/drawers (I don’t like the look or the function of front access storage at feet level).

You Can Use a Lot Less Water Than You Might Think

Because I’m still dealing with freezing temperatures (March in the mountains), I have been testing out an auxiliary interior water tank system.  I found a nice looking 10 gallon, silver colored Thermos drink cooler (like you’d use at a Soccer or Football game).  I removed the bung/spout where you’d get your drink from, and replaced it with a valve that hooks directly to the water pump.  This trip was 11 days long (including two days in the driveway), and I only filled the tank once.  To be fair, we never ran the dishwasher, but I tested that before we left, and a full load of dishes only uses three gallons of water.  So teeth brushing, washing up (there was a lot of that with all the work on the Tow Vehicle), cleaning dishes, etc. didn’t use more than around 15 gallons for the two of us for 11 days in the desert (CO, NM, AZ, NV).  I’m sure we’ll use more in the summer, but that’s kind of the beauty of the auxiliary tank for winter use when temps are below freezing outside the Airstream.

Put a Conveniently Located Switch on Your Water Pump

After several stops where water was evident in the sink, on the countertop, and in various other places, it became apparent that it would be a good idea to shut off the water pump while driving.  At first I was just removing the fuse, but it’s a pain to access on a regular basis, so I decided to mount an on/off switch next to the kitchen sink to control the water pump.

Dogs Make a Huge Mess

There doesn’t seem to be any way around this. Towels and carpet are the only apparent “solution,” but they can only do so much (catch dirt and water to make it a bit easier to clean up).  A “buffer area” outside the door (under an awning with a rug) would be a good step, but we aren’t quite there yet.  Luckily I’ve got the whole house vacuum installed, so we could perform a “meaningful” clean up whenever we had an electrical hookup.  And the dogs had to learn to sleep on the floor on this trip.  There’s just no way 11 days on the road can be comfortable with two 80 pound, adventurous (meaning: covered in nature’s filth) beasts in your bed.

Your Refrigerator Might Not Be Closing All the Way

I couldn’t figure out why our fridge wasn’t getting cold enough.  I switched between propane, 120v, and 12v, but it just wasn’t getting much below 50 degrees F.  I tried cleaning the exhaust flue and making sure the exhaust fans were working.  I adjusted the propane flame.  I messed with the thermostat and the thermistor (the wire attached to the fins inside the fridge).  Nothing was changing the situation.  Finally I realized there was a small gap around the door and the door wasn’t sealing completely.  It turns out a plastic washer on the door hinge had worn away and the door was sitting slightly lower than it should have, thus it was rubbing against the bottom of the fridge and not closing completely.  This has also happened when items inside the fridge aren’t Tetris-ed perfectly.  Once I realized the door wasn’t actually closed (!!!) and fixed the problem with the washer hinge, our 50-year-old Dometic was back to keeping perfectly cool.

The Hensley Hitch is Massive Overkill for my Setup

With the ongoing issues I’ve had with the Hensley hitch (see other posts), I decided to use only the “back up hitch” on this trip (the kind with chain leveling bars and a small, friction-based sway bar).  It worked fine, and that included facing the huge trucks on Interstate 40 as well as crazy Arizona cross-winds.  The Hensley Hitch is still more of the “dream” while driving, but factoring in all the issues I’ve had with its inadequate design, plus the  added size and weight, I have decided that the standard WD Hitch works plenty fine for a 25ft. Airstream built to be a little lighter than factory issue… even when being pulled by my tiny Jeep Liberty CRD.  And the non-Hensley Hitch is certainly more dependable.

Exhaust Will Find a Way into an Unsealed Airstream

Things are still getting covered by a fine, black film/powder (particulate matter).  Obviously, diesel exhaust is easier to *see* than gasoline exhaust, thus, I am privy to just how much tow vehicle exhaust is still entering the Airstream.  This thing is sealed up like a drum… except where it’s not.  I currently have a drain running “open” (not to a tank), and I also haven’t sealed up the front panel where the tow vehicle electrical harness enters the Airstream.  I can see lots of diesel dust at those points of ingress.  It’s amazing how badly vehicle exhaust wants to be inside our trailer!  I am certainly looking forward to finally having things all sealed up and not having to deal with black dust anymore.

Bookmarked Airstream Articles and Information

Just some links I’ve found useful…


Boondocking

http://wbccicaravan.wbcci.net/boondocking-with-your-airstream/


Plumbing

http://vintageairstream.com/plumbing/

https://www.trekwithus.com/the-complete-guide-to-rv-water-filtration/


Propane Lines and Quick Connects

http://www.introductiontoeverything.com/2017/03/connecting-my-lp-generator-to-my-rvs-lp-port/


Tripping

http://www.airforums.com/forums/f42/campsite-pics-174884.html

Things I Learned on Roadtrip #2

I keep taking The Ghost of Ohio out well before she’s ready.  Some would say I’m a glutton for punishment, but I think you “learn things better” when you experience them first hand.  Traveling with an Airstream that is under renovation, though it’s not the most luxurious situation, contributes greatly to improvements in design, layout, use, and materials.

The first road trip (at least the end of it) was a pretty miserable failure.  My kid will always have fond memories of breaking down in the middle of nowhere and being stranded for a week, and he swears that Worland, WY is his favorite place on the planet, but there’s no denying that the end of that trip (post breakdown and what it led to), was one of the worst experiences of my life …and that’s saying something.

So here I am on the second “case study” road trip.  Just me and my 5-year-old driving from Denver to Northwest Ohio.

Use your tire covers (especially when your Airstream is sitting for extended periods).

Tire blow out.  Likely the result of UV damage (covered-side tires were far less deteriorated).  I quickly learned that it is difficult to find trailer tires while on the road, and most places simply will not put anything but an ST (trailer rated) tire on a rim meant for a trailer (liability).

Luckily we had a good spare, but that also reminded me how important it is to check your spare before you leave on a trip!

Having things fastened down and contained is key.

We don’t have cabinets or permanent seating (with storage) yet, so currently everything is in bins (or loose). Even things that seemed like they would never move or slide were all over the place.  Every time we stopped, it was an adventure (and a pain) getting everything back to where we could make sense of and access our stuff.  If it’s an option, even just screwing a 2×4 to the subfloor to create a rail to keep bins from sliding is a good idea when traveling while you’re under construction.

Space to move around is a major consideration.

While it’s fun figuring out just how tightly you can cram everything into a space (Tetris-ing seems like the most efficient way to organize and store your stuff), using the Airstream with all that stuff crammed in there makes me realize how important negative space really is.  After visiting my parents, we also took on extra cargo that contributed to the issue.  Trying to move around while living became a nightmare.  This is a good lesson to learn and will definitely contribute to future layout design.

Be judicious with your preparations.

I have a problem.  I am waaaay too concerned with making sure I’m “prepared.” And to me, prepared means over-prepared, usually to the detriment of getting on the road in a timely fashion.  I also enjoy figuring out how to make my tool collection most efficient for any and all possible situations, but I’m still taking way too many tools.  Take tools that are good for emergencies and can do double-duty, but don’t waste time, space, and weight with tools for a “project” that you might undertake while on the road.  In fact, make your life so much easier and your trip so much more enjoyable by NOT doing ANY of your resto/reno projects while on the road.

A brake controller is a nice thing to have.

I realize now that I had no brake controller all the way from Denver to Indiana.  On the upside, it means the tow vehicle can handle braking with the Airstream if the controller or trailer brakes fail.  On the downside, it certainly wasn’t ideal as far as safety goes, and I’m sure I need new brake pads now.  Be sure you are familiar with your controller and how it works before you head out on the road, so you aren’t figuring out what things mean and how things work while you’re towing.  My controller looked to me like it was doing its job, but I realize now that it wasn’t hooked up properly.

Hensley Hitch Issues (know how your hitch works and travel with spare parts if you can!)

The safety chains go BETWEEN the leveling bars.  I went back and forth on this when hooking up the trailer, and I should have just taken the time to consult the manual.  It seemed like the chain would be in the way of the bars if “threaded” through the middle, so I laid them on the outside of the leveling bars.  Big mistake.  On the return trip, I actually bent one of the struts to nearly a 90 degree angle.  The struts also pinched and dented the head (the part that holds the ball hitch).

I spent almost a whole day trying to find parts to make the hitch work for the return home, but finally just threw in the towel and ended up rolling with the Airstream attached straight to the ball (Hensley Hitch removed).

Additionally, and even though I actually did take time to think about it and try different routing paths, be sure your trailer electrical connector doesn’t get pinched by the hitch.  My cord was pinched at some point (though I’m still not sure how), cutting several of the wires.  I lost my running lights; luckily the brake and turn signal wires weren’t damaged, and those things continued to function.

Materials and routing are important things to consider.

Aluminum conduit (obviously) conducts heat, and the back of your 3-way fridge gets INSANELY hot!  I had a temporary 12v line run up the wall, and it shifted and lay across the refer cooling coil.  I’m surprised it didn’t melt anything (including the wires inside).  I grabbed the conduit to move it, and it burned me good enough to blister. Idiot.  [update: I have since had a similar issue where the conduit fell across the coil again (not my fault!) and the wires inside did actually melt and blew a fuse]

Pay attention to the message other drivers are trying to convey to you!

While driving, the rear side hatch blew off (not really sure how, most likely didn’t get shut and latched properly).  When someone drives by waiving their arms wildly, sometimes they are just admiring your awesome Airstream.  However, more often than not, they are letting you know that something is flopping around or that you’ve lost something (and hopefully it didn’t hit their vehicle).

The biggest fridge isn’t always the bestest fridge.

I tried out a larger fridge on this trip, and I didn’t have it hooked up to propane.  While it’s nice having that extra space, if you are going for significant amounts of time without being able to power the refrigerator (in my case, being able to plug into 120v), you will have problems keeping things cold.  Not only will the larger fridge lose it’s cool faster than a smaller one, but it also takes longer to get it back to cool.  A smaller fridge is easier to use like a cooler (placing ice packs in it to keep it cool).  Just something to consider when deciding on fridge size.

Carry plenty of hand sanitizer and wet wipes (especially if the plumbing isn’t hooked up yet!).

Even if you have plenty of bottled water or jugs, it isn’t always convenient to haul them outside just to wipe your hands.  Wipes and sanitizer are SO much more convenient when you’re on the go (literally and figuratively).  I have also since learned that a pump container of Gojo (pumice hand cleaner) and a good rag is really nice to have if you are continually working on things covered in grease, diesel exhaust, etc.

There are armadillos in Missouri!  Lots of them.

Unfortunately, the ones we saw were all dead and lying on the side of the road.  My five-year-old and I are also convinced we saw a dead platypus (duck bill and beaver tail, no question!).  Yes, I know they only live in Tasmania and a little bit of Australia’s southern coast, but we saw one (shut up), so it must have escaped from a zoo.

Trucks have all kinds of weird diesel pumps these days.  You are not always allowed to use them.

I actually came across a station that advertised diesel, but would not sell me diesel (because I didn’t have a semi-truck). It was incredibly frustrating, especially when running on fumes.

Removing the Old Air Conditioner

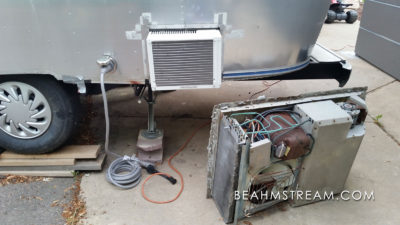
Every time I looked at the Airstream, I wanted to immediately take the old, rusty a/c off.  I resisted doing it last fall (so there wasn’t a gaping hole all winter), but even though it’s now Spring and raining quite a bit, I just couldn’t hold myself back any longer.

Someone installed the a/c that was up there with about a million tiny screws (vs. rivets)  and a WHOLE lot of goo.  The installation included two aluminum “L” rails running the length of the a/c unit.  I’m not sure what they were for (condensation?), but to me they were just more garbage to remove.  I waited till the hottest part of the day and peeled back as much goo from where I could tell the screws were, and then unscrewed as many as I could.  I think I got pretty lucky, ’cause there were only about 4 that didn’t back out.  Those four I grabbed with a vice grip from below to turn, and once they were backed out enough, I grabbed them from above.

I probably should have waited and gotten some help from a friend to bring the a/c down, but I was on a rampage, so I just laid some old sleeping bags on the Airstream skin to avoid scratching anything, and then slid the unit over and down the rails of my ladder.  That thing was heavy.  I texted my dad a pic to show him how strong I am.

So what was left was a gaping hole and a lot of nasty goo (from the looks of it, silicone, latex, vulkem, and butyl tape).  I waited till the hottest part of the next day and scraped as much off as I could with a dull chisel (to avoid scratches).  Then I used Goof Off, a scotch brite sponge, a rough rag, and a brass wire brush on the end of my drill to remove a sufficient amount of what was left.  I didn’t go to town getting it spic ‘n’ span because I still don’t know what I’m going to do up there to finish things off (bubble sky light?  gunner’s touret?  sunbathing deck?), so I’ll wait until then to make things pretty.

Once the skin was cleaned up, E and I buck riveted all the screw holes closed.  I put a dab of TremPro 635 on each hole before setting the rivet, so I’m pretty confident that everything is water tight.

There were a couple screw holes that were actually “double drilled” (two holes right on top of each other, but simply putting two rivets right on top of each other seemed to do the trick (luckily you can’t really see this stuff from the ground).

Now I just have to decide what to do with the hole that’s left.  There’s a tiny chance that I’ll put a new, smaller a/c back on the roof, but I really like the clean look not having the a/c on the roof, and I’m considering installing a split on the tongue.  For camping this summer (in our friend’s yards), I’m actually just going to put a window unit in the access opening where the water heater used to be.

airstream-a-c-01

Temporary A/C Set Up

Oddly enough, the highly rated, *almost* EnergyStar (missed the mark by .1 points –so essentially EnergyStar rated without the upcharge) window unit I found is EXACTLY the same size as the hole that already existed for the old water heater.  How lucky is that?  I will be making a sliding system from heavy duty computer-rack sliding rails so the unit can simply slide out when we reach our destination, and then back in when we’re ready to go!  I’m not sure yet if this will be just an auxiliary unit to cool the bedroom and complement a “whole trailer” unit or if it will work (in tandem with some fans and perhaps even some ducting) to cool the whole Airstream.

Airstream Dishwasher

At first thought a dishwasher might seem like an “extreme luxury” for an Airstream, but it’s actually a smart move when considering  water conservation.  Study after study has shown that a dishwasher (especially high efficiency ones like the Bosch in our home kitchen) use far less water than hand washing in the sink.  The models I have listed below uses around 3 1/4 gallons for a full load (6 place settings plus whatever else you can Tetris in there).

Not to mention, it stores your dirty dishes (until you’re ready to run the cycle), so you aren’t stacking dirty dishes in the sink (cluttering up your surroundings, preventing you from using the sink, attracting flies, etc.).

I first had the idea of putting a dishwasher in an Airstream when I saw a custom-ordered Fischer and Paykel unit on clearance at Lowe’s.  I now really wish I had bought it; I think it was marked down from $1,000 to $200.  Since it was designed for home use, it was probably too heavy and power hungry for an Airstream though (I will let these sour grapes console me).

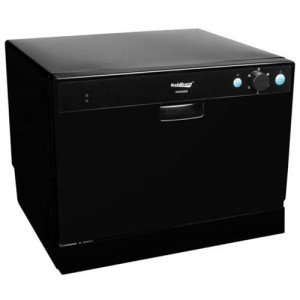
After searching “Airstream Dishwasher” I first learned about the Koldfront PDW60EB via this post:

http://www.airforums.com/forums/f432/rv-dishwasher-104296.html

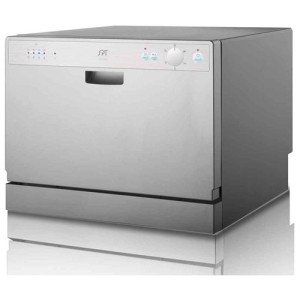
It’s around $211 in white, another ten bucks in black, and $240-$260 depending on which “brand” in silver (I wonder how close to “stainless” it really looks).

Koldfront, EdgeStar, Midea, SPT (the actual manufacturer?), Sunpentown (old name for SPT, I assume), Danby: judging by the item descriptions on Rakuten (they are pretty much word-for-word), I am assuming these are all “rebranded” versions of the same unit.  There are some slight variations in the controls (knobs vs. buttons,  number of buttons, digital readout, etc.), but the functionality/specs seem to be the same.  The models are things like PDW60W, PDW61W (newer), DDW611WLED, SD-2201W, SD-2202W (newer); the W stands for white in these models; other models use B for black and S for silver.  It looks to me like the PDWW61 and SD-2202 are second generation models and they added the ability to delay the start time for up to 8 hours.

The descriptions state that an internal water heater gets the water temperature to 149 degrees Fahrenheit (not very high compared to the Bosch in my house, but still much hotter than hand washing).  I am a big fan of the stainless interior (and not just because it matches the Airstream!). The unit also has an automatic rinse agent dispenser, which is nice for keeping your glassware spotless (I plan on serving quite a few cocktails!).  These units also have an internal pump for waste water, so you don’t have to rely on gravity.

They are made to simply attach to your kitchen sink faucet and can be removed when not in use, but I plan on “hard wiring” mine to a water and drain line.

Water consumption (normal wash): 3.5 gallons • Input voltage: 120 V/60 Hz • Power: 1160 W/10.7 A • Weight: 48.5 lbs • Dimensions: 17-3/16″ H x 21-11/16″ W x 19-11/16″ D” • Noise level: 55±3dB • Six (6) standard place setting capacity • Includes dish rack, cup shelf, and cutlery basket • Holds plates up to 10.5″ in diameter • Six (6) wash cycles: heavy, normal, light, glass, speed and soak (I’m assuming I would only ever use the “heavy” cycle, but still…)

User reviews state that the heaviest wash takes around an hour and forty five minutes and the “soak” setting is around 10 minutes (the other settings are just variations on time).  It’s best to make sure the water is running hot from the tap before starting the unit (so you get the hottest water possible and put less stress on the unit’s internal heater).  The biggest complaint seems to be the unit does not dry your dishes, but that seems to be expecting a bit much (the unit won’t do your laundry either).  Some people have mentioned just opening the unit’s door slightly right when the cycle is finished and the retained heat of the things being washed will allow everything to dry (though you’ll be venting steam into your living space).

SPT-SD-2202S EdgeStarDWP61ES

Koldfront-PDW60EBMideaADC3203DWW


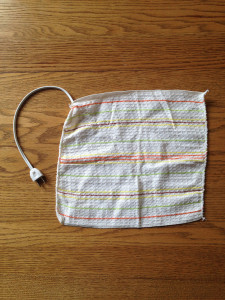
Finally, a little humor from the Airstream forums.  This is what GeocamperAS posted regarding Airstream dishwashers:

I have been searching high and low for a RV dishwasher.
Not just any RV dishwasher, but one that meets my criteria.

I finally found one.

It is small so it doesn’t take up much space.
It also uses very little water.
It can be used on electric mode when you have hook-ups.
I can be used on non-electric mode when boondocking.
And even though it is small it can clean the largest pot you have.

electric-dishwasher-2

Master To Do List

This “Master To Do List” might be a stupid idea (depressing to look at in a couple of years, when I still haven’t installed a sink!), but it’ll help me keep track of ideas and maybe link to the posts covering these topics.

  • Have brakes gone over (before hauling from Indiana to Colorado!) DONE! 10-7-15
  • Brake Controller for Tow Vehicle DONE! 10-8-15
  • Purchase/install Weight Distribution Hitch (EAZ-Lift? Reese WD Hitch? Husky HD? –Hensley would be great, but it’s just way too pricey for where we are in life)
  • Inspect and repair exterior skin leaks DONE! 11-15-15
  • Fix Vista Vue Window Leak DONE! 11-5-15
  • Clean and coat underside before installing wires/tanks/plumbing and belly pan
  • Insulation
  • Belly Pan
  • Layout
  • Toilet
  • Shower
  • Exterior Shower
  • Door Lock and Deadbolt
  • Refrigerator
  • Range/Cooktop
  • Microwave/Convection Oven
  • Kitchen Sink and Faucets
  • Bathroom Sink and Faucets
  • Lighting
  • Retractable Dining Table (converts banquette to bed)
  • Bunk Over Banquette
  • Speakers
  • A/C
  • Heater
  • Water Heater
  • Water Filter
  • Waste Tanks
  • Fresh Water Tanks
  • Interior Skin
  • Floor
  • New Rims

The Wishlist (Purchasing Plans)

This is some of the fun stuff we’ll need to buy (not necessarily a “to do” list, just some of the things that will make this Airstream extra cool).

Inside

  • Dishwasher (this will actually SAVE water)
  • Washer/Dryer Combo (?eventually?)
  • Full (-ish   …yes, I realize that sounds an awful lot like “foolish”) Size Fridge (?eventually?)
  • 4/5 Burner Range (I will be doing some serious cooking in this thing!)
  • Microwave/Convection Oven
  • Tankless Water Heater (for those long showers when we’re hooked up to city water!)
  • Point of Use Water Heater for Kitchen
  • Composting Toilet (still trying to make sure this is what we want)
  • Component rack for computer and speaker amplifier 

Outside

  • Awning
  • Solar Panels
  • Exterior Shower (no hunching over when it’s warm outside!)
  • A/C (possibly a split?)
  • Front Window Rock guard (why do I think these look SO COOL?!) 

SCORE! Dometic RM2310 RV Refrigerator

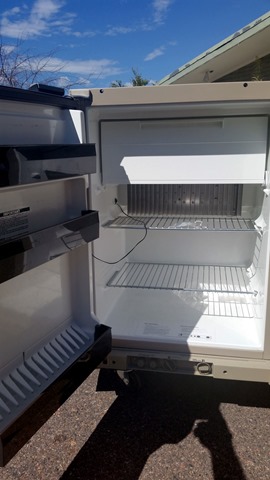
20150813_104011Last week I was at an architectural salvage place, and someone had just dropped off a Dometic RM2310 3-way (propane, 110v, 12v) refrigerator.

I plugged it into a power outlet and… it works!

Evidently the original owner, an older guy, had actually returned the day before to bring in some additional things for the fridge that he hadn’t been able to find when he dropped it off (original receipt, schematics, operating manual, etc.), so I’m guessing it was well taken care of.

My dad just paid $1,000 for a new Dometic fridge for his camper-van, so $25 for mine seems pretty darn good! Yahoo!

It even has a groovy, padded, off-white vinyl front, which I think we may keep!

With my extreme love of cooking, I was originally planning for a larger fridge and will still likely end up with one in the future, but this is a great way to at least start out with a solid, propane powered RV fridge for almost no money.

Boondocking here we come!

20150813_104029