Vintage RV Interiors (Greatest Hits)

Airstream Problems and Build Quality

While I firmly believe that Airstream is the best mass-produced travel trailer available, they are not without their issues.  A lot of people seem to think that for the price (usually over $100k), there should be no issues, but obviously that’s not realistic.  From what I understand, Airstream does do a pretty good job of fixing that which wasn’t done correctly in the first place (and you can stay at the “mothership” while they fix it!). Do “small things” fail too often?  Probably.  Are there some really bad ideas/designs implemented on a fairly regular basis.  Maybe.  But “batting 500” is considered stellar (if not impossible) in terms of baseball stats, and Airstream is probably doing better than that, so it all depends on perspective.

Many Airstream problems are a result of poor design, but those problems are almost always “luxury” problems (cabinets, appliances, layout, latches, etc.), not major mechanicals or the design of the body and frame.

Most Airstreams also aren’t built for “owner maintenance.”  As such, when something goes wrong, it can be incredibly difficult to fix.  Sometimes people end up “breaking things more” while attempting to fix something that they shouldn’t have been messing with in the first place.

The issue is similar to the Apple vs. PC mentality.  Apple products are made to only function with Apple components; by keeping things close, Apple creates an environment where they have more control over the outcome.  Apple products are meant to be “worked on” only by licensed Apple specialists.  PC’s are made more for the “do-it-yourself” crowd, and there are a plethora of components that can be used to make things work in myriad ways.  Apple is generally thought of as a product for people who just “want things to work.”  If those items stop working as they should, Apple customers send them back, trade them in, or have an “expert” fix them.  Airstream definitely operates by the Apple code, and the price of the initial product as well as the maintenance reflects that ideal.

Another issue is often that people try to use their Airstream outside of it’s window of expected use (sub-zero camping, questionable road conditions, etc).  In other words, they are pushing the boundaries of what Airstream has intended for the trailer.  Many people believe that if you spend over $100,000 for a trailer, it should work all of the time, in any condition.  But what those people fail to consider is that it’s more like owning a Ferrari.  If you don’t baby it, things will go wrong, and it will be expensive to fix them… if you can even find someone with the expertise to do the work properly.

All of these thoughts are going into my idea of what an ideal Airstream renovation should entail.  I think the build should certainly be “done right” in the first place (no cabinets “anchored to air” or missing fasteners), but it should also be user-friendly, so that when something goes wrong (because thing will go wrong when you’re bouncing down the road for years), they can be easily fixed by anyone with a decent idea of “how things work.”  Components should also be readily available, so that it doesn’t take weeks (or even months!) of waiting for parts or service windows.

Any time something is mass-produced, you make sacrifices in quality control (the more hands there are, the more opportunity there is for mistakes).  The “Apple mentality” is one way of trying to minimize those issues.  I prefer the “one-at-a-time” approach (which is certainly a luxury), and that’s how I plan to renovate and reinvent travel trailers.  I don’t plan on getting rich.  I just plan on building great vehicles.


Here are some threads I’ve collected that reflect people’s varied opinions on Airstream build quality and service, as well as some of the specific things that seem to consistently go wrong…

“Attention to detail” issues…
https://www.airforums.com/forums/f44/advice-2020-classic-attention-to-detail-issues-209849.html

Designed to sell, not to use…
https://www.airforums.com/forums/f240/designed-to-sell-not-to-use-207769.html

Frustrated with Airstream quality…
http://www.airforums.com/forums/f540/frustrated-with-airstream-quality-194992.html

Forty things we would change on our Airstream…
https://www.naturephotoguides.com/travel/40-things-we-would-change-on-our-airstream

Had it with my Basecamp…
http://www.airforums.com/forums/f404/had-it-with-my-basecamp-183574.html

Bath mirror cabinet fell off…
http://www.airforums.com/forums/f542/bath-mirror-cabinet-fell-off-of-2018-flying-cloud-23cb-186245.html

Bath vanity failure…
http://www.airforums.com/forums/f44/bath-vanity-failure-198410.html

Remounting medicine cabinet to prevent falling…
https://www.airforums.com/forums/blogs/gmfl/remounting-23d-medicine-cabinet-to-prevent-falling-2973

Leaking, rust, A/C issues, drawers off tracks, cabinet alignment…
https://www.airforums.com/forums/f295/airstream-quality-and-reliability-208302.html

Component choices…
http://www.airforums.com/forums/f445/shurflo-revolution-2-3-or-3-0-gpm-187499.html

Custom Hybrid RV Toilet

I definitely prefer boondocking over crowded campsites.  As such, a black tank is a hindrance beyond an inconvenience.  All that water, holding capacity, and weight wasted on simply flushing a toilet.  The obvious solution is a composting toilet, but the market leaders require maintenance that I feel is unnecessary (mainly, a small urine tank you have to empty by hand, cranking a handle to stir up the solid waste, and finally, disposal of solid waste).

Some composting toilets allow you to plumb the urine diverter to the gray tank.  That’s a good idea (no dumping a urine jug).

At the time of my build, I was surprised that there didn’t seem to be anyone in the US selling a stand alone urine diverter, especially with how many blog posts there were on building bucket toilets for off-grid houses, etc.  That has since changed (there are now a lot more options), but I will give props to the couple in England who made a business of selling their urine diverter online.  I paid $45 on eBay, which seemed a little steep for a molded piece of plastic, but it was definitely quick and easy, and I’ve been happy with the product and design.

So then how to improve on the #2 part?  Well, it seems like ever since human kind invited cats into their homes, the problem has been “solved.”  Yes, I believe that a human litter box is the way to go.  They key to this, however, is the exhaust fan.  The reason a composting toilet functions well is because there is a 12v continuous exhaust fan sucking out any odor and making sure the compartment is void of all moisture.  As long as this idea is incorporated, the human litter box is a great solution.

So basically, all one needs to do is build a fancy “outhouse” setup where the toilet in the Airstream would normally go.  A cabinet box houses the bin that will catch the solids as well as the urine diverter and the exhaust fan.  You need a deck on top of the cabinet with a toilet seat attached.  That’s pretty much it.

For the deck, I wanted a solid material that is as easy as possible to clean (for obvious reasons), thus, I chose a heavy duty commercial kitchen cutting board (18″x24″).  It’s an inch thick, so plenty solid, and it’s made to be easily wiped completely clean (removing bacteria, etc., in a kitchen setting).  I searched a bit online and found the Winco CBXH-1824 for $30 from a commercial kitchen supplier.  I used the toilet seat as a template, and then cut the hole with a reciprocating saw.  I then used a router to round off the sharp edge.

For the seat, I chose a “soft close” hinge (it doesn’t slam) and found a seat with a lid that is actually molded over the edge of the seat, to form a kind of seal.  I thought about making a gasket to make the seat and lid really seal, as I thought this would help mitigate odor, but it turns out that the exhaust fan really does completely eliminate odor, and leaving a little bit of an air gap around the seat (vs. sealing it completely) helps with air flow.

I was a little worried that I hadn’t left a vent stack through the roof.  I didn’t want to vent through the side wall for aesthetic reasons, and I was worried that venting through the floor wouldn’t work very well.  I did some poking around online, and there were a few people who had installed set ups in their Sprinter vans that included exhaust vents through the floor, so I decided to give it a try.  It has worked great.  No complaints with functionality, and after a year of use, any worry about excessive odor due to not venting above the nose line has been assuaged.

The vent fan box build…


The most convenient way to plumb the urine diverter in my build was to pipe into the lavatory sink drain pipe.  This has the added bonus of “flushing” the toilet (anything standing in the drain pipe) when you wash your hands. I though that was pretty clever.


So I just place a trash bag in the bin (the plastic container that the kitty litter came in happens to be the perfect size), ad a little kitty litter (like, just a couple cups), and the exhaust fan takes care of the rest. With two people, every couple of weeks or so I take the deck off the toilet cabinet and remove the bag from the bin and toss it in a dumpster.  We’ve been using this set up for more than a year, and I have to say I’m extremely pleased with the results.  And there has never been any odor!  My eight-year-old actually prefers the Airstream toilet to the ones in the house.


Things I Learned on Roadtrip #5

So… we’re getting there.  This is the first trip where things started being… genuinely comfortable.  We traveled over two thousand miles in nine days from Denver to Alamosa (via the mountainous highway 285) to ABQ to the Grand Canyon to Las Vegas and back.

All appliances function as they should.  We’ve got running water and drains, a working toilet (which is completely custom and water-less, though not quite perfected yet), a working dishwasher, kitchen cabinets for pantry storage, a powerful whole-house vacuum (a must-have with dogs), a dining table with seating, television with game console (N64!), propane heat, air conditioner, a Fantastic Van, and comfy beds.  The only major thing that’s missing is a water heater (and eventually the radiant heat system), but we didn’t really miss it on this trip, even though there were times when outside temps were below freezing (in a pinch, if you really need warm water to wash up with, you can always heat up a pot on the stove).

I still need a more permanent window covering solution (we’re currently using panels that fit inside each window cavity), but I’m getting close on that.

The Fewer Things You Have to Move for Access the Better

I made the dinette seating so you can keep bins below for “utility stuff” and other sundries (extension cords, bungees, lantern, tape, velcro, etc.), as well as access to the 12v system (batteries, converter/conditioner, and 12v fuse panel).  While it’s really nice having all that storage space, it really is a pain to have to move people, cushions, and anything else sitting on the bench before lifting the bench panels to get at the things you need.  And I found out quickly that I need to get at those things a LOT more often than I anticipated (don’t even think about keeping dog food under your seating!).

Future builds will definitely include a larger exterior-access utility bay for tools and other “heavy utility” things, and I am still working on ways to make the under-seating storage better without resorting to front-access panels/doors/drawers (I don’t like the look or the function of front access storage at feet level).

You Can Use a Lot Less Water Than You Might Think

Because I’m still dealing with freezing temperatures (March in the mountains), I have been testing out an auxiliary interior water tank system.  I found a nice looking 10 gallon, silver colored Thermos drink cooler (like you’d use at a Soccer or Football game).  I removed the bung/spout where you’d get your drink from, and replaced it with a valve that hooks directly to the water pump.  This trip was 11 days long (including two days in the driveway), and I only filled the tank once.  To be fair, we never ran the dishwasher, but I tested that before we left, and a full load of dishes only uses three gallons of water.  So teeth brushing, washing up (there was a lot of that with all the work on the Tow Vehicle), cleaning dishes, etc. didn’t use more than around 15 gallons for the two of us for 11 days in the desert (CO, NM, AZ, NV).  I’m sure we’ll use more in the summer, but that’s kind of the beauty of the auxiliary tank for winter use when temps are below freezing outside the Airstream.

Put a Conveniently Located Switch on Your Water Pump

After several stops where water was evident in the sink, on the countertop, and in various other places, it became apparent that it would be a good idea to shut off the water pump while driving.  At first I was just removing the fuse, but it’s a pain to access on a regular basis, so I decided to mount an on/off switch next to the kitchen sink to control the water pump.

Dogs Make a Huge Mess

There doesn’t seem to be any way around this. Towels and carpet are the only apparent “solution,” but they can only do so much (catch dirt and water to make it a bit easier to clean up).  A “buffer area” outside the door (under an awning with a rug) would be a good step, but we aren’t quite there yet.  Luckily I’ve got the whole house vacuum installed, so we could perform a “meaningful” clean up whenever we had an electrical hookup.  And the dogs had to learn to sleep on the floor on this trip.  There’s just no way 11 days on the road can be comfortable with two 80 pound, adventurous (meaning: covered in nature’s filth) beasts in your bed.

Your Refrigerator Might Not Be Closing All the Way

I couldn’t figure out why our fridge wasn’t getting cold enough.  I switched between propane, 120v, and 12v, but it just wasn’t getting much below 50 degrees F.  I tried cleaning the exhaust flue and making sure the exhaust fans were working.  I adjusted the propane flame.  I messed with the thermostat and the thermistor (the wire attached to the fins inside the fridge).  Nothing was changing the situation.  Finally I realized there was a small gap around the door and the door wasn’t sealing completely.  It turns out a plastic washer on the door hinge had worn away and the door was sitting slightly lower than it should have, thus it was rubbing against the bottom of the fridge and not closing completely.  This has also happened when items inside the fridge aren’t Tetris-ed perfectly.  Once I realized the door wasn’t actually closed (!!!) and fixed the problem with the washer hinge, our 50-year-old Dometic was back to keeping perfectly cool.

The Hensley Hitch is Massive Overkill for my Setup

With the ongoing issues I’ve had with the Hensley hitch (see other posts), I decided to use only the “back up hitch” on this trip (the kind with chain leveling bars and a small, friction-based sway bar).  It worked fine, and that included facing the huge trucks on Interstate 40 as well as crazy Arizona cross-winds.  The Hensley Hitch is still more of the “dream” while driving, but factoring in all the issues I’ve had with its inadequate design, plus the  added size and weight, I have decided that the standard WD Hitch works plenty fine for a 25ft. Airstream built to be a little lighter than factory issue… even when being pulled by my tiny Jeep Liberty CRD.  And the non-Hensley Hitch is certainly more dependable.

Exhaust Will Find a Way into an Unsealed Airstream

Things are still getting covered by a fine, black film/powder (particulate matter).  Obviously, diesel exhaust is easier to *see* than gasoline exhaust, thus, I am privy to just how much tow vehicle exhaust is still entering the Airstream.  This thing is sealed up like a drum… except where it’s not.  I currently have a drain running “open” (not to a tank), and I also haven’t sealed up the front panel where the tow vehicle electrical harness enters the Airstream.  I can see lots of diesel dust at those points of ingress.  It’s amazing how badly vehicle exhaust wants to be inside our trailer!  I am certainly looking forward to finally having things all sealed up and not having to deal with black dust anymore.

Painting the Interior

In my initial interior painting tests, I experimented with several readily available (Home Depot/Lowe’s/auto parts stores) spray paints for plastic.

While Krylon Fusion seems to be the only one that says “this is made specifically for plastic and bonds chemically with plastic” (paraphrasing the text on the can), I have read and been told that Rust-Oleum 2x Painter’s Touch bonds with plastic in a similar way.

The Krylon Fusion is many people’s go to, but it comes in very few color choices.

The Rust-Oleum Painter’s Touch 2X Ultra Cover has MANY more color choices (though you are still much more limited than mixing your own or using a Latex wall paint).

Some people have mentioned that Valspar (carried by Lowe’s) also makes some sprays, but the colors were so few (and nothing on the can indicated that the product would be *great* on plastic), so I didn’t include it in my test.

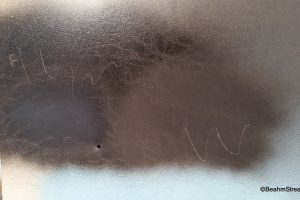
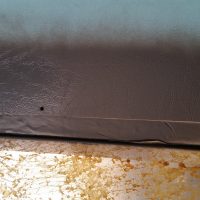
After doing some thorough surface prep with xylene and acetone (which actually “etches” the plastic for better adhesion as well), I sprayed different single applications and combinations of paint on the backside (where the experiment won’t be visible in the final install) of my two plastic sliding window inserts on our 1972 Tradewind. After waiting two weeks (plenty of time for the paints to completely cure), I did some scratch tests.

My final application includes several clear coats, which I experimented on separately after making my initial spray paint selection. I also tested various finishes and brands for the clear coat: matte, satin, semi-gloss, gloss, Krylon Fusion, Rustoleum 2x, Rustoleum Enamel clear, Duplicolor Acrylic, etc.

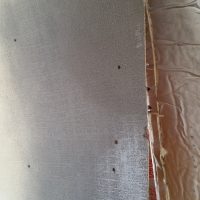
I did a similar paint test on the vinyl coated interior skins, examining how the “plastic specific” spray paints adhere to the glued-on vinyl coating.

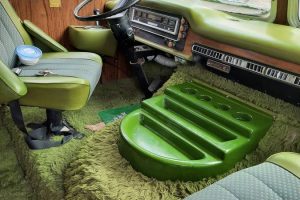
The original covering for many vintage Airstream interiors is a substance called Zolatone that is actually still available (though more difficult than regular paint to apply and fairly expensive).  Some interior skins also utilized a glued-on Vinyl “grass cloth.”  Our Airstream has the factory adhered vinyl.  Some people choose to strip the vinyl from the aluminum skins, but unless you’re actually going to leave the skins aluminum (not painted), I think it’s best to paint the vinyl coating, especially since it’s so durable. Not only that, but getting paint to stick to bare aluminum is quite difficult, even with the “aluminum specific” primers and etchers available.

I have seen a few owner’s complaining about the vinyl coming off of their interior walls over time, but ours is adhered incredibly well, even after being stored in the PO’s barn and covered in various barnyard animal scat collections (be-do-bop-de-doo).

When I cleaned the skins (trying Simple Green, TSP, Goof-Off (xylene, 2-ethanol), and paint stripper), the vinyl stayed completely adhered until I left the paint stripper on for extended periods of time (lesson: if you want to get that vinyl coating off your walls to expose the bare aluminum, use paint stripper, leave it on for a while, and the vinyl will peel right off).

First impressions regarding spray paint on plastic panel/inserts and vinyl over metal skins…

Between the two main brands that specifically advertise “bonding to plastic,” the Krylon Fusion does seem to stick a bit better (it doesn’t scratch off as easily as the Rust-Oleum Painter’s Touch 2x Ultra Cover and holds up to a clear coat much better). Places where I put down Rustoleum 2X Ultra Cover Flat Gray Primer before a coat of another color (no matter the brand/type) does seem a little more scratch resistant, but it’s probably just that the scratch is showing gray underneath instead of (very visible) white (the original surface). I think a better primer for bare plastic might be a flat Krylon Fusion. I am not as impressed as I’d hoped with Rustoleum Universal Bonding Primer. It is pretty thin and runs quite easily, though I do still use it for spray painting metal, especially shiny metal.

The Rust-Oleum Universal Metallic is probably the least durable on the  plastic inserts and end cap, but somehow the most durable on the vinyl skins. Go figure.

Dupli-Color Trim & Bumper (Dark Charcoal) was a late addition to the test, and after just one day it seemed about as durable as the Krylon and Rustoleum that had been curing for more than two weeks (in comparison, a new color of Rust-Oleum 2X I added at the same time came off like butter when scratched the next day). The Trim & Bumper paint is advertised as having “Fade-X Technology” and also boasts “flexible finish” and “excellent adhesion,” but the colors are extremely limited (like… three colors: black, white, and gray). However, if it’s made for bumpers, I’m hoping it might be the most durable of the bunch? I’m also wondering about it’s possibility as a primer.

After two weeks (plenty of time for everything from the first batch of sprays to cure), I started testing

clear coats. The bad news is that when Rust-Oleum 2X Ultra Cover Satin Clear was sprayed on heavily, it caused ALL paints (every type and brand) on the plastic inserts to crack, bubble, and flake. Seriously. You simply can’t use it on Krylon or Rustoleum applied to the plastic in my Airstream unless you apply many, many very thin, light coats.  When used in a heavy application, the Rust-Oleum clear coat did OK for the paints that were on the vinyl, but be aware that it clouded up a bit at first and  then cleared up.

The Dupli-Color Acrylic Enamel “custom matte finish” gave  much better results.  Be aware though, when sprayed on thick, it did cause all the Rust-Oleum flavors to bubble and crack like the Rust-Oleum clear coat, though not quite as badly..  The Dupli-Color Acrylic Matte Clear did very well with the Krylon Fusion and even with the Dupli-Color Trim & Bumper (with minimal curing time; it became as tough or tougher over night vs. having to wait a week). I also like the matte finish of the Dupli-Color better (it’s more “invisible”) than the Rust-Oleum Satin (which has some sheen), but the comparison of the look isn’t really fair as it’s apples to oranges (matte to satin).

Also note that both the Rust-Oleum and Dupli-Color clear coats caused the Rust-Oleum Ultra Cover 2X Satin Aqua (the only actual color in the test) to discolor (both clear coats made it look a bit yellowed).

Like so many things Airstream related, it turns out the “most perfect” isn’t really “enough more perfect” to warrant basing my decision upon the results.  Practicality wins out over “the ultimate” once again.  To me, there wasn’t a big enough difference in the durability of all the products and combinations to warrant sticking with the winner (the bumper paint), and I just went with the one that I liked the looks of best.

I sprayed the fiberglass rear end cap and part of the rear vinyl skins (everything in the bedroom) with Rustoleum Universal Metallic in “Flat Soft Iron.”  It’s a charcoal gray I really like, and it’s got a nice, subtle, metallic sparkle to it when the sun catches it.  Since I used Rustoleum for the color coat, I decided to stick with their products for the clear coat in case it might aid compatibility.  I used two coats of Rust-Oleum Painter’s Touch 2x Ultra Cover Satin Clear.

Next I painted the plastic “sliding shade” housing in the VistaVue windows with Krylon Fusion in “Satin Dover White” (the only “off-white” they offer, but also close enough to the original color). I also painted the actual vinyl coated aluminum “sliding shades” with metallic copper and finished with Krylon Fusion Clear Gloss (for metallics you need to use a clear coat, because a satin or flat finish clear coat will dull the metallic sheen).  I did try four different kinds of “metallic copper” ranging in price from five bucks to fifteen, but all of them seemed to look and perform exactly the same, so now I just purchase Rust-Oleum Bright Coat Metallic Finish by the case from Amazon for anything I’m doing in copper.

You know what I learned from all these spray paint tests?

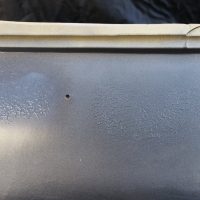
Scratches gonna scratch.

While I did my best to get things as durable as possible, if something really goes to town on the skins (like keys, or a large sheet of something getting swung around), they scratch.  Also, where there is repetitive motion, whether from road vibration or repeated use (like opening/closing the shade), there’s really nothing you can do about the fact that the paint will scratch off.  There is some solace in the fact that the products I used are readily available, so touch ups are relatively painless.

The next step would be 2 part epoxies and gel coats, but at this stage in the game, I’m not willing to go that far, and I’ll just stick with touching things up every once in a while.

ALSO…

After all these tests, and the incredible amount of time and cost it took to do the small bedroom area with rattle cans (it took north of 20 cans of consumer spray paint for that small area), I decided to give rolling regular house paint a try in the kitchen area.  I cleaned all the vinyl coated interior skins with TSP-PF (the slightly more “earth friendly” version of TriSodium Phosphate) then rolled on a coat of Valspar Bonding Primer/Sealer and waited 48 hours for it to cure (probably overkill).  I then rolled on two coats of Clark & Kensington Interior Satin Enamel.

After a couple days of letting the interior house paint cure, I would say the durability of the rolled on paint in the kitchen is far superior to the spray paint in the bedroom.  You can still scratch it, but the house paint is able to heal a bit, whereas the spray paint is more brittle, and thus “breaks off” when scratched.  The house paint also allows for the second rolled-on coat to scratch and reveal the first coat, where the spray paint all comes off at once.  Looks like if I’m reusing interior skins that are covered in the factory vinyl, I’ll be rolling on paint from now on.

It just goes to show, that sometimes the easiest way actually IS the best way (not always, maybe not even often, but sometimes!).

Some links I perused ad referenced while doing the research for painting the interior skins:

http://www.airforums.com/forums/f7/starting-mostly-gutted-flying-cloud-83715.html

Interiors

http://www.airforums.com/forums/f39/im-restoring-my-1970s-end-caps-finally-124989.html

Dinette Table Base

I am always baffled when I see Airstream interiors with a couch or two chairs under the panoramic window.  What a waste of space!  The dinette with seating that wraps around a table is obviously the way to go, so one can maximize on seating, have a decent table at which to eat, and also to collapse into an extra bed. Not to mention all the extra storage in the dinette bench seats!

However, I can’t believe how hard it is to find a decent telescoping base for a dinette table!

Most of the choices come from yacht outfitters, and are thus astronomically priced.  The few “RV Specific” bases I have found seem to be poorly reviewed as a result of being poorly constructed (weak materials that lead to wobbling and bending).  The two companies that come up most often in a search for RV dinette/table bases are Springfield and Garelick.  The products from each company look to be fairly similar, but for what it’s worth, the reviews for the Springfield products are much better than those for the Garelick.  This means that either the Springfield bases are a superior product, or Springfield has a better social media and internet team.

Through Deck vs. Surface Mount

Since I’m rebuilding from scratch, this wouldn’t be as much of an issue for me, but it definitely does lock you in to the position you originally install (since it telescopes through a permanent hole in the floor, and sticks out into the belly pan area).  I think most people will want a surface mount base, and since there isn’t much difference in availability between surface mount and through-deck, I’m just going to stick with surface mount (which is ultimately an easier install anyway).

The surface mount, telescoping pedestal base that seems most solid, best reviewed, and within price range (though still more expensive than I would expect at around $400) is the Springfield 12″ – 28″ Anodized Air-Powered 3-Stage Table Pedestal.  There are three slight variations that included differences in lift range and finish materials, but this one has the lowest price (by about 40 bucks) and the highest reviews.  It’s also conspicuously similar to the base pictured in the Airstream brochure photo above, so there’s that.

Another interesting and slightly less expensive (around $250) option from Springfield is the lever lift Springfield Marine 1660203 Polished Aluminum 12-25 Inch Adjustable Hinged Boat Table Pedestal, though it’s quite a bit bulkier, and I see lots of opportunity for pinched (or even lost!) fingers.

Penguine Eng LTD looks great and has a lot of selection, but it’s in Great Britain, so there’s VAT and shipping on top of already “luxury” pricing.

Motorized Pedestals

Motorized is great for the “wow” factor, but my philosophy is, “The more you motorize things, the more opportunity there is for mechanical failure.”  If you can make something function well without sacrificing ease of use, that is the way to go.  Can gas/air systems fail?  Of course.  Will they fail as often as something that uses electricity, plastic gears, wires and solder, etc.?  Nope.  If gas/air makes it easy to lift/lower a table (vs. a completely manual system which is difficult to slide up and down and lock in place) while minimizing the chance of mechanical failure, then for me, a gas/air lift telescoping base is the superior choice.


Have you found something else that you like or think works better?  Leave a comment and let everyone know!

Things I Learned on Roadtrip #2

I keep taking The Ghost of Ohio out well before she’s ready.  Some would say I’m a glutton for punishment, but I think you “learn things better” when you experience them first hand.  Traveling with an Airstream that is under renovation, though it’s not the most luxurious situation, contributes greatly to improvements in design, layout, use, and materials.

The first road trip (at least the end of it) was a pretty miserable failure.  My kid will always have fond memories of breaking down in the middle of nowhere and being stranded for a week, and he swears that Worland, WY is his favorite place on the planet, but there’s no denying that the end of that trip (post breakdown and what it led to), was one of the worst experiences of my life …and that’s saying something.

So here I am on the second “case study” road trip.  Just me and my 5-year-old driving from Denver to Northwest Ohio.

Use your tire covers (especially when your Airstream is sitting for extended periods).

Tire blow out.  Likely the result of UV damage (covered-side tires were far less deteriorated).  I quickly learned that it is difficult to find trailer tires while on the road, and most places simply will not put anything but an ST (trailer rated) tire on a rim meant for a trailer (liability).

Luckily we had a good spare, but that also reminded me how important it is to check your spare before you leave on a trip!

Having things fastened down and contained is key.

We don’t have cabinets or permanent seating (with storage) yet, so currently everything is in bins (or loose). Even things that seemed like they would never move or slide were all over the place.  Every time we stopped, it was an adventure (and a pain) getting everything back to where we could make sense of and access our stuff.  If it’s an option, even just screwing a 2×4 to the subfloor to create a rail to keep bins from sliding is a good idea when traveling while you’re under construction.

Space to move around is a major consideration.

While it’s fun figuring out just how tightly you can cram everything into a space (Tetris-ing seems like the most efficient way to organize and store your stuff), using the Airstream with all that stuff crammed in there makes me realize how important negative space really is.  After visiting my parents, we also took on extra cargo that contributed to the issue.  Trying to move around while living became a nightmare.  This is a good lesson to learn and will definitely contribute to future layout design.

Be judicious with your preparations.

I have a problem.  I am waaaay too concerned with making sure I’m “prepared.” And to me, prepared means over-prepared, usually to the detriment of getting on the road in a timely fashion.  I also enjoy figuring out how to make my tool collection most efficient for any and all possible situations, but I’m still taking way too many tools.  Take tools that are good for emergencies and can do double-duty, but don’t waste time, space, and weight with tools for a “project” that you might undertake while on the road.  In fact, make your life so much easier and your trip so much more enjoyable by NOT doing ANY of your resto/reno projects while on the road.

A brake controller is a nice thing to have.

I realize now that I had no brake controller all the way from Denver to Indiana.  On the upside, it means the tow vehicle can handle braking with the Airstream if the controller or trailer brakes fail.  On the downside, it certainly wasn’t ideal as far as safety goes, and I’m sure I need new brake pads now.  Be sure you are familiar with your controller and how it works before you head out on the road, so you aren’t figuring out what things mean and how things work while you’re towing.  My controller looked to me like it was doing its job, but I realize now that it wasn’t hooked up properly.

Hensley Hitch Issues (know how your hitch works and travel with spare parts if you can!)

The safety chains go BETWEEN the leveling bars.  I went back and forth on this when hooking up the trailer, and I should have just taken the time to consult the manual.  It seemed like the chain would be in the way of the bars if “threaded” through the middle, so I laid them on the outside of the leveling bars.  Big mistake.  On the return trip, I actually bent one of the struts to nearly a 90 degree angle.  The struts also pinched and dented the head (the part that holds the ball hitch).

I spent almost a whole day trying to find parts to make the hitch work for the return home, but finally just threw in the towel and ended up rolling with the Airstream attached straight to the ball (Hensley Hitch removed).

Additionally, and even though I actually did take time to think about it and try different routing paths, be sure your trailer electrical connector doesn’t get pinched by the hitch.  My cord was pinched at some point (though I’m still not sure how), cutting several of the wires.  I lost my running lights; luckily the brake and turn signal wires weren’t damaged, and those things continued to function.

Materials and routing are important things to consider.

Aluminum conduit (obviously) conducts heat, and the back of your 3-way fridge gets INSANELY hot!  I had a temporary 12v line run up the wall, and it shifted and lay across the refer cooling coil.  I’m surprised it didn’t melt anything (including the wires inside).  I grabbed the conduit to move it, and it burned me good enough to blister. Idiot.  [update: I have since had a similar issue where the conduit fell across the coil again (not my fault!) and the wires inside did actually melt and blew a fuse]

Pay attention to the message other drivers are trying to convey to you!

While driving, the rear side hatch blew off (not really sure how, most likely didn’t get shut and latched properly).  When someone drives by waiving their arms wildly, sometimes they are just admiring your awesome Airstream.  However, more often than not, they are letting you know that something is flopping around or that you’ve lost something (and hopefully it didn’t hit their vehicle).

The biggest fridge isn’t always the bestest fridge.

I tried out a larger fridge on this trip, and I didn’t have it hooked up to propane.  While it’s nice having that extra space, if you are going for significant amounts of time without being able to power the refrigerator (in my case, being able to plug into 120v), you will have problems keeping things cold.  Not only will the larger fridge lose it’s cool faster than a smaller one, but it also takes longer to get it back to cool.  A smaller fridge is easier to use like a cooler (placing ice packs in it to keep it cool).  Just something to consider when deciding on fridge size.

Carry plenty of hand sanitizer and wet wipes (especially if the plumbing isn’t hooked up yet!).

Even if you have plenty of bottled water or jugs, it isn’t always convenient to haul them outside just to wipe your hands.  Wipes and sanitizer are SO much more convenient when you’re on the go (literally and figuratively).  I have also since learned that a pump container of Gojo (pumice hand cleaner) and a good rag is really nice to have if you are continually working on things covered in grease, diesel exhaust, etc.

There are armadillos in Missouri!  Lots of them.

Unfortunately, the ones we saw were all dead and lying on the side of the road.  My five-year-old and I are also convinced we saw a dead platypus (duck bill and beaver tail, no question!).  Yes, I know they only live in Tasmania and a little bit of Australia’s southern coast, but we saw one (shut up), so it must have escaped from a zoo.

Trucks have all kinds of weird diesel pumps these days.  You are not always allowed to use them.

I actually came across a station that advertised diesel, but would not sell me diesel (because I didn’t have a semi-truck). It was incredibly frustrating, especially when running on fumes.

Using a Kitchen Sink for a Shower Pan

Kitchen Sink as Airstream Shower PanI’ve been thinking about using a utility sink (often referred to as a “slop sink” or “mop sink”) for our Airstream’s shower pan.  I was at an architectural salvage place last week, and they had a high-end, black kitchen sink.  PERFECT.  It looks cool.  It’s very sturdy.  And it’s a single basin with a kind of “step” for dishes that will now be an actual step!

There are two holes (faucet and soap dispenser) that will either get plugged, or maybe I’ll actually run copper pipe through the holes as part of the shower design.

This “designer” sink obviously looks waaaay better than a plastic slop sink, even though it weighs a bit more (though, that comes with being much more durable than thin plastic).  I think having a shallower sink (vs. a utility sink) will be better too.  It’s still deep enough for a kid to take a bath, but it won’t be such a pain to climb in.