

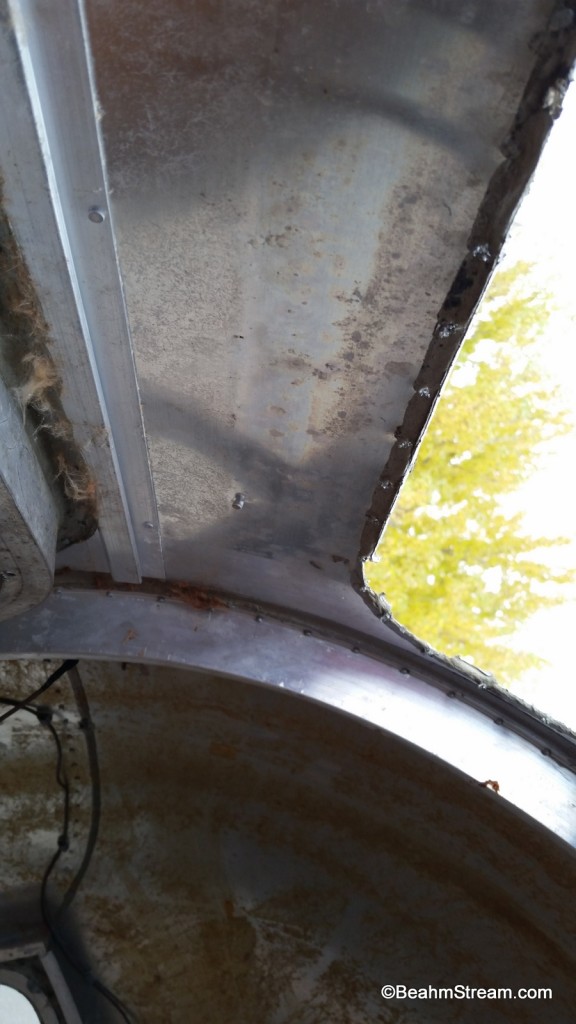
Today I removed, cleaned, and reinstalled a VistaVue Window. Someone had tried to “repair” the leaks in the window with about a gallon of silicon (only a slight exaggeration). Don’t EVER use silicon to “fix” leaks on an Airstream. It looks awful and is impossible to remove if you need to redo the seal. The only place you should use silicone is to adhere weather stripping gasket (around doors, windows, and hatches) and where glass is in direct contact with something (meaning, a window gasket). Instead of using silicone, use a polyurethane caulk. I really like TremPro 635. Parabond comes in a container that’s more like a toothpaste tube, so it might be easier to take with you for mobile repairs.

removing rivets (check out that crazy silicone mess!)
I drilled out all the bucked rivets, removed the tons and tons of silicon and other adhesives from the resulting hole in the Airstream as well as the window bracket (the aluminum around the glass), then I went the extra step and removed the bracket from the glass and cleaned the gasket that was in between the glass and aluminum frame. Getting the frame off of the glass can be tricky. There are actually metal pins in each channel where the two pieces of the frame come together in the center.

See the metal pins holding the two pieces of frame together?

you can see the pins a little better here
The bottom pins had rusted away completely from water sitting inside the window frame, but the top pins were still there (and very strong). I ended up prying the two frame pieces apart slightly with a chisel, then I cut the two pins with a Dremel cut-off wheel.

another close up of the frame pins
These pins will slide in their respective channels (though it’s hard to move them), so I ended up leaving them in place, then pushed them back over to function as they original did once I put the two pieces of aluminum frame back together. One half of each pin will still work even though they are shorter now from being cut. I thought about trying to get the second half of each pin out to use on the other side, but they are in there REALLY tightly and the small channels for the pins in the other side were too badly corroded to accommodate the pins anyway.
I used a brass wire brush (gentler than steel so it doesn’t deep-scratch and ruin the soft aluminum) to clean the big stuff off of the aluminum surfaces of the Airstream body and window frame, then mineral spirits and a rough rag to remove the smaller left over gunk. I used a razor blade to carefully remove silicone from the surface of the glass, then went over the glass with mineral spirits and a rough rag. I also found that if I was gentle I could use super fine (0000) steel wool to help get off the really tenacious stuff without scratching the glass.

cleaning off more silicone
I washed the gasket with warm, soapy water.

washing the gasket
The gasket had hardened a bit on the lower side (where water and minerals had sat in the frame), but there was only one small split in the actual material, so I decided to reuse the gasket instead of ordering more and having to wait for it to arrive (VTS: 70’s Window Gasket). This also meant the gasket would be a single, continuous piece and already sized for the window so I didn’t need to worry about over stretching the gasket material.
I have read on other blogs that people have forgone the gasket and just set the glass inside the frame after applying liberal amounts of silicone, but I like that I don’t have to worry about the glass touching the metal frame, and the gasket gives it a firmer hold (it is tight in the frame channel).
After washing the gasket thoroughly and cleaning out the window frame channel with a brass wire brush and mineral spirits, I squeezed clear 3M Marine Silicone (purchased at the local big box store) into the gasket and slipped the gasket over the edge of the window glass. I then squeezed a liberal amount of the clear silicone into the two pieces of window frame and slid the two pieces of the aluminum frame over the glass and gasket.

You need to clamp the frame onto the glass while it dries. I used a ratched strap for the long axis, and cheap Harbor Freight grip clamps for the shorter axis.

clamping while the silicone dries (note: don’t clamp the center too tight!!)
Unfortunately, I made the mistake of clamping the center of the frame too tight and ended up with a slightly “bow tie” shaped window frame; the added bonus here was that the center holes no longer lined up to the skin for riveting. What this means is that the corners of the frame are not snug against the glass, thus you shouldn’t try to make the center of the frame snug against the glass or you will end up with the bow tie like I did.
I solved the problem by using a clamp (reversed) to stretch out the center of the frame and am just crossing my fingers that the seal holds up (I re-siliconed the gaps where the gasket pulled away from the frame, but I’m hoping there was enough silicone in the channel that it wouldn’t have leaked anyway).
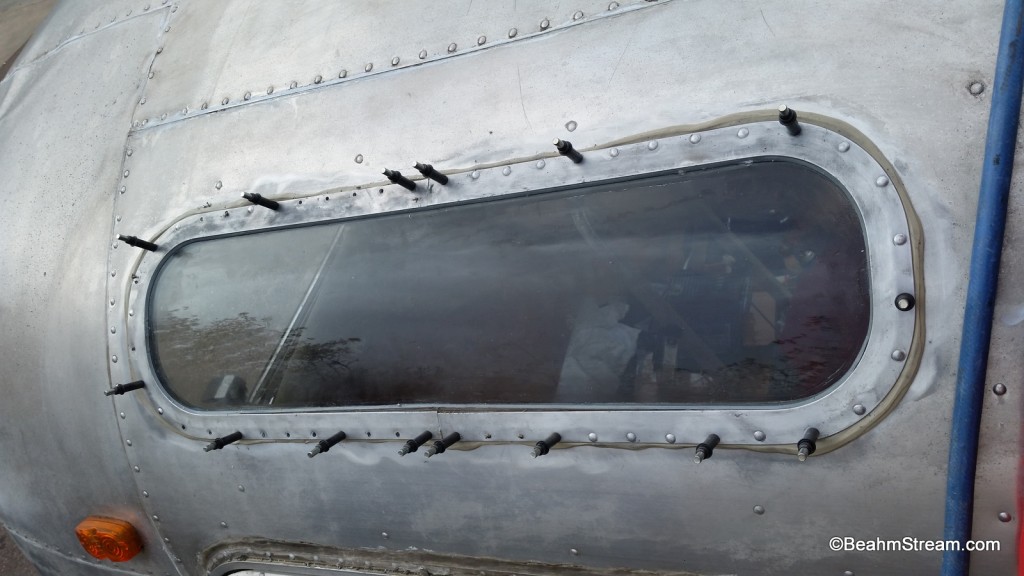
Butyl tape (that stuff is GREAT) was placed around the perimeter of the window frame before riveting the window back in place. I am leaving the butyl tape “squished out” for a while so it can shrink and expand in the sun, then I’ll trim it with a utility knife.

showing the butyl tape
Hopefully the leaks are now banished forever! See the complete photo gallery from the job below.
-

- removing rivets (check out that crazy silicone mess!)

-

- close up of the chaos


-

- the metal pins holding the two pieces of frame together


-

- removing the aluminum frame from the window gasket

-

- you can see the pins a little better here

-

- another shot of the gasket


-

- showing the frame pins cut


-

- washing the gasket

-

- cleaning off more silicone

-

- another close up of the frame pins

-

- my son, hard at work


-

- the gasket


-

- clamping while the silicone dries (note: don’t clamp the center too tight!!)


-

- clecoed in place
-

- showing the butyl tape


-

- each hole was injected with TremPro 635 in addition to the butyl tape

Great instructions and pictures!! Thank you for documenting to help the rest of us out!
This is extremely helpful! I’m having a hard time even separating the two frames of the window apart—any tips? It’s not even close to the point where I can fit a dremel between the two.
@Alia… if you can *carefully* place a chisel in the crack where the frame will separate and gently tap, you can usually get the frame to open a little (then pry the rest of the way). Also, try first using a “rust buster” type material like WD-40 or PB Blaster and letting it soak into the area with the split and the pin to help loosen up any corrosion or other gunk that might be holding it together.
For anyone interested, I found Miller Garage had some very detailed videos. the link below starts his series but also look for the others on windows. I don’t have personal experience yet but I will definitely review his steps when doing mine.
https://www.youtube.com/watch?v=mKH2Lc_vR2U
I had the same problem. I ended up using a hack saw to cut the joins and then penetrating oil and an air hammer to get the pins out. Definitely a hassle.
source for window gaskets
https://www.vintagetrailergaskets.com/
Outstanding tutorial! Thank you!